
Tips angående I-Tunes.....Edit:Fra Flac til Apple Loosless?
- Trådstarter authentic
- Startdato
K
KindOfBlue
Gjest
Min erfaring er at optisk gir best dybde og presisjon - men det er meg. (Sammenlignet med analog ut).
Men du har vel ikke coaxial ut også? Du mener analog minijack? DACen som Apple har sett seg råd til inne i AE er ikke noe videre, men så lenge man har mulighet for optisk ut er det jo det samme.
I følge John Atkinsons anmeldelse av AE så er datafilen som går over optisk fra AE bit-perfect identisk med utgangspunktet, og bedre kan det jo ikke bli.
Tenkte ut ifra hvordan den sto koplet mot Squeezeboksen fra Logitech -(koaksial), hvorfor det låter bedre aner jeg ikke men bedre er det...Spesielt enkelt er det å høre det på at skillnaden mellom artister/instrumenter kommer bedre fram og rommet de spiller i er klart bedre definert, Burmesters "test" cd med deriblant Hans Theessink og Hugh Masekela har aldri vært morsommere å høre på.KindOfBlue skrev:Min erfaring er at optisk gir best dybde og presisjon - men det er meg. (Sammenlignet med analog ut).
Men du har vel ikke coaxial ut også? Du mener analog minijack? DACen som Apple har sett seg råd til inne i AE er ikke noe videre, men så lenge man har mulighet for optisk ut er det jo det samme.
I følge John Atkinsons anmeldelse av AE så er datafilen som går over optisk fra AE bit-perfect identisk med utgangspunktet, og bedre kan det jo ikke bli.
")
MVH Johnny
Er strålende fornøyd med min I-phone men siden jeg har kjøpt den med 8 Gb er det ikke mye plass til mye musikk i loosless, ;D
Jeg konverterte ca 10 album fra loosless til mp3, planen var å legge disse inn i egen spilleliste i Tunes for så å overføre disse til TLF`en, problemet var bare at disse blandet seg med de orginale loosless albumene og samme sangene kom som mp3 filer og loosless filer under samme artist i bibloteket... :-\
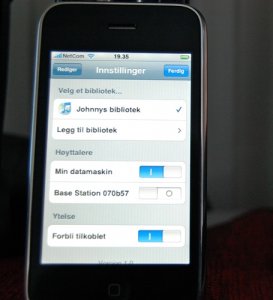
Har også tenkt på å opprette biblotek nr2 men vil ikke dette krasje med synkroniseringen med orginalbiblotek ?
Har dere noen tips råd......
MVH Johnny
Jeg konverterte ca 10 album fra loosless til mp3, planen var å legge disse inn i egen spilleliste i Tunes for så å overføre disse til TLF`en, problemet var bare at disse blandet seg med de orginale loosless albumene og samme sangene kom som mp3 filer og loosless filer under samme artist i bibloteket... :-\
Har også tenkt på å opprette biblotek nr2 men vil ikke dette krasje med synkroniseringen med orginalbiblotek ?
Har dere noen tips råd......
MVH Johnny
K
KindOfBlue
Gjest
Det der er ikke noe problem, og har ingenting med restriksjoner å gjøre.
Nå som folk er begynt å avspille lossless reduserer det selvsagt kapasitet på den bærbare spilleren å ha filer i det formatet, i tillegg så øker det belastningen på prosessoren, og reduserer dermed batteritid på en iPhone å avspille lossless filer.
Løsningen er å lage mp3 versjoner av filene, og legge disse i en separat Playlist. Jeg kaller min iPod. Deretter gir du iTunes instruksjon om å kun synke musikk som ligger i denne filen til din iPod. Du kan lage tilsvarende begrensninger når det gjelder hva som skal ses av filer når du avspiller lossless.
Enkelte installerer to forskjellige versjoner av iTunes, med ulike kontoer, på samme computer, og dedikerer den ene til iPod/iPhone og den andre til lossless avspilling. Døp om den ene til iTunes iPod om du velger denne løsningen.
iTunes er et utrolig avansert program, med multifunksjoner.
Her har du en superressurs når det gjelder å skreddersy hva iTunes gjør for deg:
http://dougscripts.com/itunes/
Folk som ikke kjenner iTunes aner ikke hva de går glipp av.
Valgte å opprette biblotek nr.2, Dette biblotek bruker jeg til å synce I-phonen, enkelt å lagre lossy filer,filmer og diverse annet.
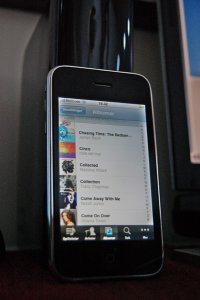
Har brukt søkemotoren i I-tunes endel i det siste å må si jeg er mildt sagt overrasket over hvor enormt rask og god denne er, finner alt jeg søker på.
Må igjen påpeke hvor logisk alt er lagt opp med I-phonen, nå er ikke min musikksamling i Tunes av de største men kan tenke meg at de med flere tusen albumer vil enkelt kunne navigere med Remoten i Tunes på en særdeles rask måte.Samtidlig må jeg si at jeg ikke skjønner problemstillinga med låsing mot Apple Tunes, her er er jo muligheter uansett hva en ønsker å gjøre,.... bruk litt tid på å lære seg å kjenne programmet så åpner det seg muligheter.
MVH Johnny
Vedlegg
-
 85.7 KB Visninger: 232
 -
 104.7 KB Visninger: 230
- Ble medlem
- 01.12.2002
- Innlegg
- 1.291
- Antall liker
- 1.679
Nå kom jeg meg i mål jeg og. Kjøpte bærbar pc med 320 gb harddisk, Apple Airport kobler Supra digitalkabel inn i 800 pre. Styrer alt med iphone. Funker som bare rakkern. Utrolig skjønt å styre musikkvalget bare noen knappetrykk. ;D
Fant foresten ut at apple selger en Monster iCable til 279 kr samt at Supra har en til 345 kr
Fant foresten ut at apple selger en Monster iCable til 279 kr samt at Supra har en til 345 kr
Gratulerer med en fantastisk fin løsning,....en av de største fordelene med denne i forhold til annet jeg har prøvd er muligheten for raskt å navigere mellom de forskjellige artister, spesielt de med store musikksamlinger kan jeg tenke meg drar fordel her, samt at ting går raskt.tand skrev:Nå kom jeg meg i mål jeg og. Kjøpte bærbar pc med 320 gb harddisk, Apple Airport kobler Supra digitalkabel inn i 800 pre. Styrer alt med iphone. Funker som bare rakkern. Utrolig skjønt å styre musikkvalget bare noen knappetrykk. ;D
Fant foresten ut at apple selger en Monster iCable til 279 kr samt at Supra har en til 345 kr
Tror også det er mulighet for å kontrollere Apple Tv med Remoten, har ordnet meg U.S konto i I-Tunes, her er det mulighet for å kjøpe/leie HD filmer direkte til TV`en hjemme.Driver å ser på mulighetene for hvordan dette virker, og hvordan dette kan intergreres hjemme på en fornuftig måte.
MVH Johnny
- Ble medlem
- 01.12.2002
- Innlegg
- 1.291
- Antall liker
- 1.679
Det eneste jeg har opplevd av hang ups, er når jeg går ut av "Remote" modus, dvs mottar en samtale; skriver sms e.l så klarer ikke Iphonen å koble seg opp igjen. Jeg må rett og slett restarte Itunes.
En annen bagatell er at jeg ikke får til Cover Flow som man kan gjennom IPod.
Har dere tilsvarende erfaringer eller er det noe jeg har glemt å merke av/på.....
En annen bagatell er at jeg ikke får til Cover Flow som man kan gjennom IPod.
Har dere tilsvarende erfaringer eller er det noe jeg har glemt å merke av/på.....
Har lest brukermanualen til Apple Tv men lurer fremdeles på ett par ting.
1.Når en har lagt inn videoer i Tunes så blir jo disse filene konvertert til ett Loosy format (Noe en må gjøre?) Er det slik at filmen streames fra Tunes til Apple Tv boksen ?
Og evnt hvordan blir kvaliteten når en blåser opp bildet fra 13" til en 42"
2.Hvis det er slik at musikken streames fra Tunes til Apple boksen da blir filen lagret i Apple boksen ?
3.Kan en styre styre dette med I-Phone igjennom Remote programmet--?
4.Forstår det slik fra Apple sine sider at en kan velge filmer som dukker opp fra tv menyen uten å laste dem igjennom I-Tunes først, .....vil det være mulighet å streame disse filene/filmene tilbake til I-Tunes ved en senere anledning?
5.Og hvis det er slik at en kan kjøpe HD filmer hvor stor plass opptar slike filer på Harddisken?............og Kan slike High Definition filer streames....?
Noen som vet...
MVH Johnny
Hei,tand skrev:Det eneste jeg har opplevd av hang ups, er når jeg går ut av "Remote" modus, dvs mottar en samtale; skriver sms e.l så klarer ikke Iphonen å koble seg opp igjen. Jeg må rett og slett restarte Itunes.
En annen bagatell er at jeg ikke får til Cover Flow som man kan gjennom IPod.
Har dere tilsvarende erfaringer eller er det noe jeg har glemt å merke av/på.....
Nei, det finnes ikke støtte for coverflow med remoten (hvis jeg har skjønt det rett), mulig det kommer ved en senere oppgradering.
Har ikke opplevd slik "hang ups" ved å gå inn og ut av Remoten men tror ikke jeg har skrevet sms eller ringt en samtale for så å gå "inn" igjen...heller.
MVH Johnny
G
Gjestemedlem
Gjest
Noe mer ubrukelig rammel enn en Apple TV skal man letre lenge etter. Denne plastklumpen presterer å ikke engang støtte avspilling av divx/xvid, noe selv den billigste Rema 1000 dvd spiller greier. Ikke har den TV tuner heller så selv navnet er en vits.johnnygrandis skrev:Har lest brukermanualen til Apple Tv
Ubrukelig appleskrot på sitt aller verste. :'(
K
KindOfBlue
Gjest
Gjestemedlem - husk at det er UNIX som driver kjerra.
===
DIVX/XVID på AppleTV
Warning: you're about to engage in some serious, potentially warranty-voiding hacking. Just the way you like it, right? Ready to get your hands dirty? We need to download a few files first.
Download - ATVFiles plugin.
Download - Perian, the swiss army knife of QuickTime codecs.
Download - A52Codec, an AC3 codec.
Download - Custom ssh.plist file to start sshd automatically.
Optional
Download - Fugu, a nice OS X GUI to transfer files to the Apple TV.
Download - WinSCP to a nice Windows GUI to transfer files to the Apple TV.
Download - If you don't have an Intel Mac, you will need this Intel version of sshd.
Materials needed
A Mac of some sort - Sorry, you've got to be able to read the Apple TV's drive to at least get sshd going.
other stuff here.
We are going to do this in two steps. For those who do and do not already have SSH enabled. So if you've got SSH running on your Apple TV, skip ahead to the next section.
Enable SSH on the Apple TV (requires a Mac)
Remove the drive the same way we did to expand the drive and plug it into a Mac, then launch Terminal. Our first command is going to copy the Intel version of ssh daemon from our Mac to the ATV drive. If you are on a Intel Mac copy it from your sbin directory to the ATV's OSBoot/usr/sbin/ directory. If your browser causes the line to wrap be sure to enter it on one line in the Terminal.
sudo cp /usr/sbin/sshd /Volumes/OSBoot/usr/sbin/
You can also copy it from your downloads directory:
cp /Users/Engadget/Downloads/sshd /Volumes/OSBoot/usr/sbin/
Make sure sshd is executable
sudo chmod +x /Volumes/OSBoot/usr/sbin/sshd
Backup the original ssh.plist to our home directory:
cp /Volumes/OSBoot/System/Library/LaunchDaemons/ssh.plist ~
Now copy the new one from our downloads directory to the Apple TV drive:
cp /Users/Engadget/Downloads/ssh.plist /Volumes/OSBoot/System/Library/LaunchDaemons/
Before we dismount the drive to reinstall into the Apple TV, let us see if we need to clean up after Spotlight again.
Perform these command and check if the .Spotlight files are on the partitions by typing:
ls -a /Volumes/Media
and
ls -a /Volumes/OSBoot
Now, if you do see those .Spotlight files, use the following command to remove them. But be careful, this is the dreaded rm -rf command, which has the potential to ruin everything.
sudo rm -rf /Volumes/OSBoot/.Spotlight-V100
or
sudo rm -rf /Volumes/Media/.Spotlight-V100
Now dismount the drive and install it in your Apple TV. If you need to give your friend's Mac back, feel free. From here on out you can fly PC on this op, if you so choose.
Test it by signing in via terminal. (The password is frontrow.)
ssh -1 frontrow@AppleTV.local
That should get you in. So let's start installing the good stuff, shall we?
Adding additional QuickTime components.
Before we can start copying files we need to ssh into the Apple TV and mark the volume as read / write. A few times we will use sudo (as in sudo make me a sandwich) and a password will be requested; it's also frontrow. From the terminal, ssh to the Apple TV:
ssh -1 frontrow@AppleTV.local
Now remount root as read / write. (Enter frontrow for the password.)
sudo mount -o remount,rw /dev/disk0s3 /
At this point you can use Fugu (our scp file transfer frontend) if you prefer. Otherwise, use the commandline scp to copy the following files to the Apple TV. But before you can preform this step you need to mount all the DMGs you downloaded and uncompress ATFiles so you can have the necessary files handy.
Now, copy the ATVFiles plugin, Perian and AC3 QuickTime components to the Apple TV. (As always, depending on the location of these files your command will differ.)
scp -1 -r /Users/Engadget/Downloads/ATVFiles-0.2.1/ATVFiles.frappliance/ frontrow@AppleTV.local:~
scp -1 -r /Volumes/Perian\ 0.5/Perian.component frontrow@AppleTV.local:~
scp -1 -r /Volumes/A52Codec\ 1.7.2/A52Codec.component frontrow@AppleTV.local:~
If you have the MPEG-2 QuickTime component then you can copy that too, but otherwise it's probably not worth the $20.
scp -1 -r /System/Library/QuickTime/QuickTimeMPEG2.component/ frontrow@AppleTV.local:~
Now we need to use ssh to move the files to the proper directory so QuickTime can find them.
ssh -1 frontrow@AppleTV.local
sudo mv ATVFiles.frappliance/ /System/Library/CoreServices/Finder.app/Contents/PlugIns
sudo mv Perian.component/ /Library/QuickTime/
sudo mv A52Codec.component/ /Library/Audio/Plug-ins/Components/
sudo mv QuickTimeMPEG2.component/ /System/Library/QuickTime/
Now we need to restart Finder so it will load the plugin, you could pull the power (easy way) or you could run a couple commands (slightly less easy way). Here those are, if you're paranoid about unplugging your unit; find the pid to kill:
ps ax | grep Finder
This will return a line with the pid for finder.
Now kill Finder's pid. (Ours was 512 when we wrote this.)
kill 512
After Finder restarts we will see a new menu item named Files, which allows us to play movies stored in /Users/frontrow/Movies on the Apple TV. So we'll copy a movie there, shall we? (Again you can use scp, or Fugu if you prefer.)
scp -1 ~/Movies/Gothika_480p_XviD.avi frontrow@AppleTV.local:~/Movies/
All you have to do is select the clip to play from the files menu.
Voila! Your Apple TV just got a whole helluva lot more useful.
Of course there are many more codecs that work by using the same basic method of installing QuickTime plugins into the ATV's directory structure. And don't even get us started on all the other plugins being developed for this bad boy. Hell, you can even mount AFP or NFS shares and stream videos instead of copying them. The possibilities are kind of endless for this little Unix box, but hopefully this guide well get you on your way. Good luck!
- Ble medlem
- 08.07.2005
- Innlegg
- 1.963
- Antall liker
- 2
iTunes konverterer/ripper ikke filmfiler (en merkelig mangel egentlig). Du må først ha en filmfil som du så kan legge inn i iTunes. Handbrake (www.handbrake.fr) er et bra program for å rippe DVD til disk og ved å velge beste kvalitet (tar laaang tid) så ser jeg ingen forskjell fra orginalen på mitt 75" lerret.johnnygrandis skrev:1.Når en har lagt inn videoer i Tunes så blir jo disse filene konvertert til ett Loosy format (Noe en må gjøre?) Er det slik at filmen streames fra Tunes til Apple Tv boksen ?
Og evnt hvordan blir kvaliteten når en blåser opp bildet fra 13" til en 42"
Apple TV synkroniserer innholdet fra iTunes til disken er fylt opp. Deretter blir innholdet stramet.2.Hvis det er slik at musikken streames fra Tunes til Apple boksen da blir filen lagret i Apple boksen ?
Ja3.Kan en styre styre dette med I-Phone igjennom Remote programmet--?
Det vet jeg ikke.4.Forstår det slik fra Apple sine sider at en kan velge filmer som dukker opp fra tv menyen uten å laste dem igjennom I-Tunes først, .....vil det være mulighet å streame disse filene/filmene tilbake til I-Tunes ved en senere anledning?
Det er vel kun kapasiteten på hjemmenettet som setter begrensninger for hva som kan streames. Vil ikke tro det skal være problem å streame HD innhold om du går for kablet nett.5.Og hvis det er slik at en kan kjøpe HD filmer hvor stor plass opptar slike filer på Harddisken?............og Kan slike High Definition filer streames....?