CSS Criton.2 MLTL build

Diskusjonstråd Se tråd i gallerivisning

  • MattiasBGD

    Medlem
    Ble medlem
    06.06.2014
    Innlegg
    21
    Antall liker
    41
    Greetings from Sweden,

    After being very satisfied with the SDX12 subs I decided to also try a speaker kit from CSS.
    I love ribbons since before when I have owned a bunch of different XTZ speakers so this kit suited my taste and wallet.

    First of when receiving the kit I liked how well packaged it was and shipping was less than 2 weeks from ordering until it reached my door in Sweden. Just as good as the SDX12 drivers.

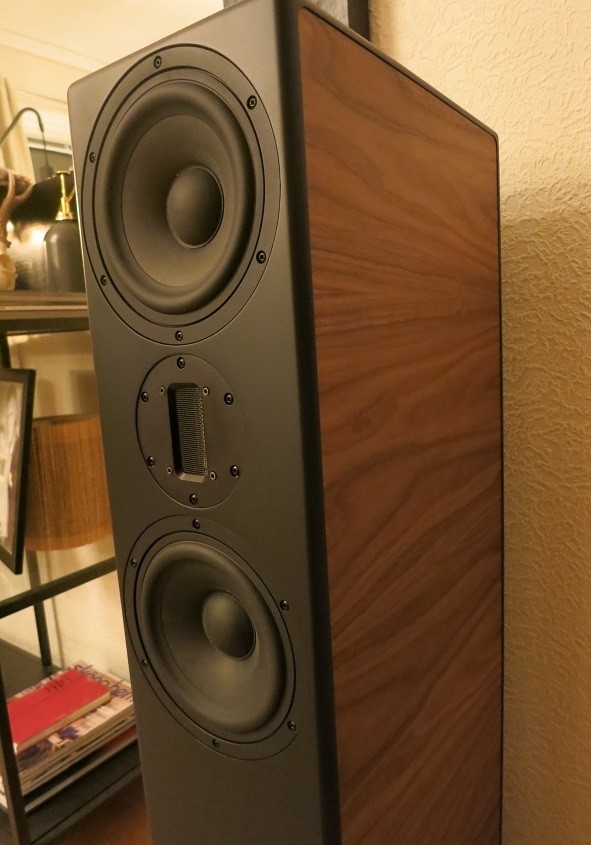
    Unpacking revealed a heavy ribbon tweeter (much heavier than the one I replaced in my XTZ speaker which had failed). The ribbon had protective film attached which is very good since ribbons can get damaged easily you should never vaccume clean or blow into them I was told.
    The 7" woofers looks really nice to with a sturdy cast frame and paper composite cone which should sound very natural in the midrange. The surrounding looks like it should have good Xmax.

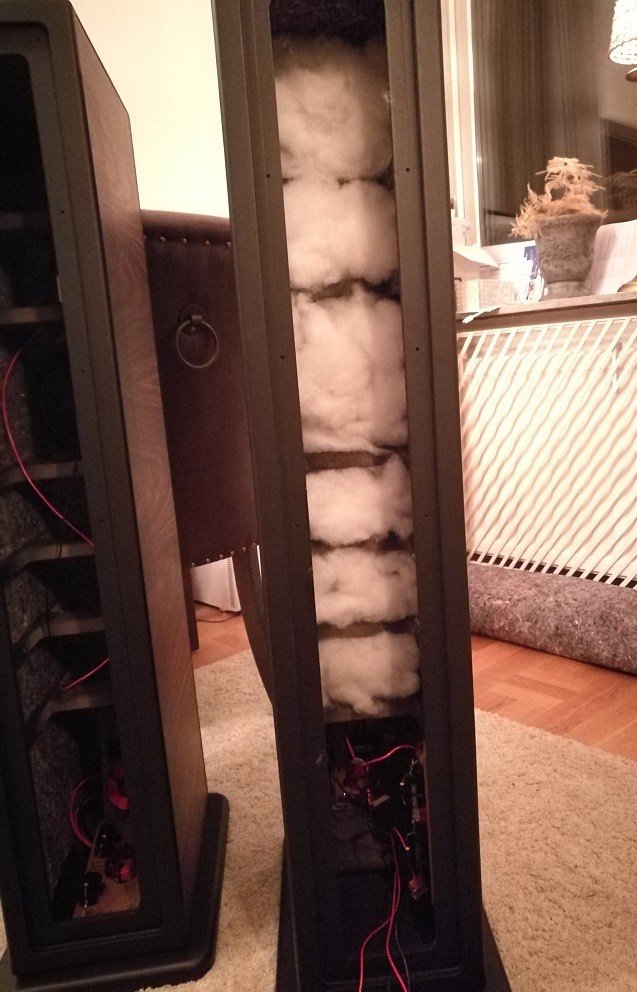
    I should have started building this kit long ago but many things has happened one of them was daughter number two added to the family. So mean time some things happened the kit was redesigned with a new Team revision crossover and the MLTL design was added and now I have crossover design from both the early RAW crossover and new Team edition and I will try them both and listen which one I like the most.

    //Mattias Vendel with help from Albin Lyckestam”
     
    • Liker
    Reaksjoner: KJ

    MattiasBGD

    Medlem
    Ble medlem
    06.06.2014
    Innlegg
    21
    Antall liker
    41

    Felt like I needed something proper behind the drivers instead of two layers of mdf... hurricane nuts or similar may in worst case scenario get loose and then you have a huge problem removing the driver.


    My first intention was to do as big roundovers on the vents as possible but after a lot of reading I found recommendations and flow simulations showing a radius of 3-5mm has less output turbulence. Tried to find to info again with no luck... may find it again if I take a look around.


    Here is the two footplates with a little smaller fotprint (5mm) on the top plate and 5mm in height hopefully it will give a nice touch to the design. Will probably add some holes to the underside so I can hide sonic design feet later on (not spikes) for hardwood floor which decouples the cabinet from the floor.


    As told in the assembly guide from CSS 45degree cuts around the driver cut outs for best airflow behind the driver. Did a little extra one around the tweeter too because I like working with the handrouter so much :)


    In position


    The good and the bad... hours was running late and we were in a hurry to do some gluing and saved time when we didn´t use more the sketched lines to align the bracing not recommended if you want it perfect.


    The backsides was not finished so we used what we had to put the cabinet under pressure without breaking it.


    Doweling the port and bracing would have been the best option but I found these pieces which had the right thickness.


    Better this time.


    And gluing on the bottom and top end.


    Meantime I removed some wood that was not supposed to be (CNC program missed something)


    Had to see the drivers in place :)


    MattiasBGD

    Medlem
    Ble medlem
    06.06.2014
    Innlegg
    21
    Antall liker
    41
    Team revision crossover

    The layout with the kit templates. I actually received glue on templates but overlooked them in the package so I didn´t use them when I assembled the crossover.


    Placed them in the same manner as the printed template but did tighter markings around the components.

    Team revision crossover

    Here I´m using the adhesive foam tape which will remove any risk of vibrating components.


    Almost done just some soldering job left.

    -------------------------------------------------------

    First edition Al Wooley crossover


    Woofer network


    soldering


    All done just need to solder on the connection wires but not until I have the cabinets at home.

    The tweeter resistor is lifted from the mdf board by bending the wire into a small leg down a whole on each side and fixed with a glue gun.


    I have one comment to Bob at CSS about the zip ties they are by far the worst I have used they broke very easily so I had to get some from my car to finish the assembly. I work as an electrician so I now which kind of quality to be expected.
     

    MattiasBGD

    Medlem
    Ble medlem
    06.06.2014
    Innlegg
    21
    Antall liker
    41
    No update yet but maybe next week... lot´s of things at home now and my workshop friend Albin is moving to a new apartment in Gothenburg.
     

    TEK

    Overivrig entusiast
    Ble medlem
    10.02.2002
    Innlegg
    912
    Antall liker
    108
    Sted
    Trondheim
    Torget vurderinger
    1
    Impressive work. Really liked your crossover layout!
     

    MattiasBGD

    Medlem
    Ble medlem
    06.06.2014
    Innlegg
    21
    Antall liker
    41
    So this took far to long... but now I´m back on track the previous cabinets was badly damaged by an accident in the workshop so they were thrown in the recycle bin.


    Hopefully paint job on sunday. :)
     

    MattiasBGD

    Medlem
    Ble medlem
    06.06.2014
    Innlegg
    21
    Antall liker
    41
    Well this year and last years longest DIY build finaly has some progress, I got tired waiting for the workshop to help me with the paint job and obviously I have had many other things to take care of with family and the house so its´partly my own fault to-


    Missed a few photos when repairing a minor router accident on a cabinet corner but this was fixed with a 2K epoxy fill.
    Went on with sealing the MDF did some research and found out that Shellac does the trick but also found out that the newer water based product may be a very simple mixture of 50/50 water and wood glue... no more words on that but it seems to work very good.
    Lite sanding and then some primer not water based since this can rise some fibers and you get a rough surface.


    I would be happy to use a spray gun to finish the cabinets but changing the roof and other stuff keeps me from spending that kind of money on equipment right now.
    Later on I will probably build a DIY paint booth but right now the roller will be good enough but why not I have seen people painting cars with a roller :smile:


    How to Paint your Car without a Gun | The Smoking Tire
    https://www.ifixit.com/Guide/Hand+Painting+a+Car/7307
     

    MattiasBGD

    Medlem
    Ble medlem
    06.06.2014
    Innlegg
    21
    Antall liker
    41
    Well I was not very happy with the results I accomplished with the roller maybe cheap paint, wrong amount of white spirit... bought a bunch of spray cans better result but why did I throw on the high gloss :(
    Spray cans can be ok but it´s a waste of money it will be expensive to paint bigger projects so I should have bought a spray gun from start.


    So two choices wet sand and polish the high gloss and do the same with the other cabinet or sand down the gloss and buy two cans of matte black...
     
  • Laster inn…

Diskusjonstråd Se tråd i gallerivisning

  • Laster inn…
Topp Bunn